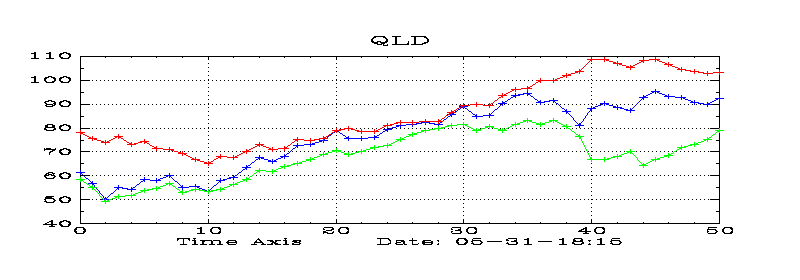
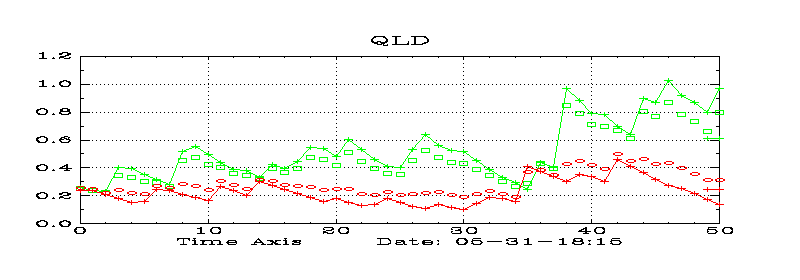
| QLD (Monthly) |
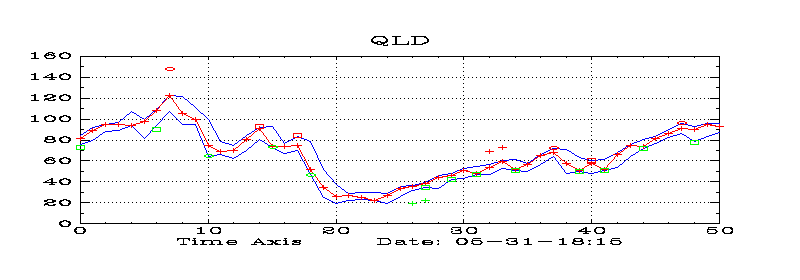
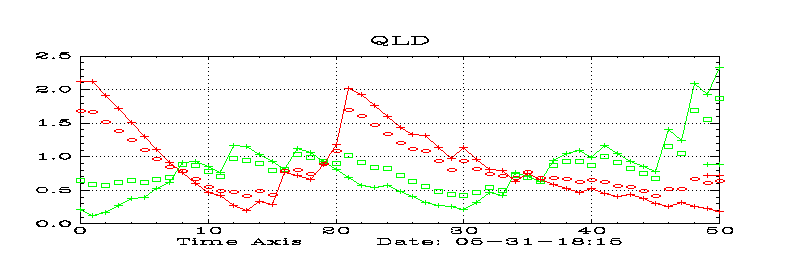
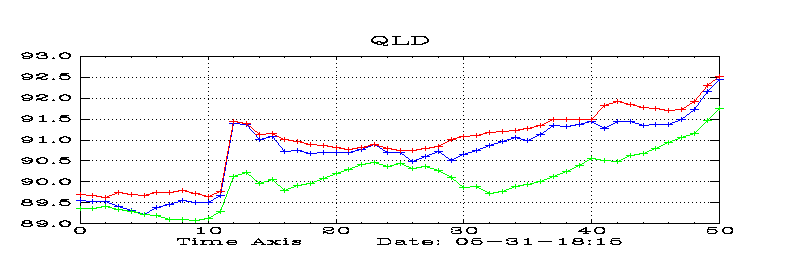
| QLD Trend Strength for Monthly |
 |
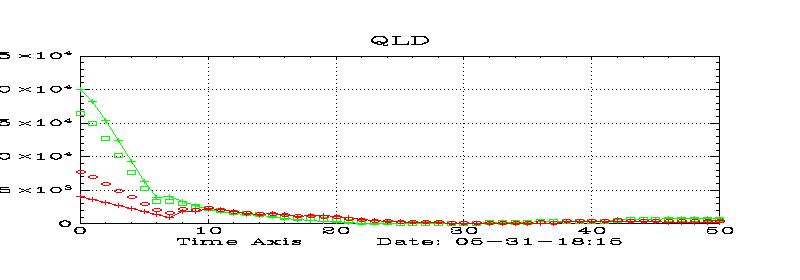
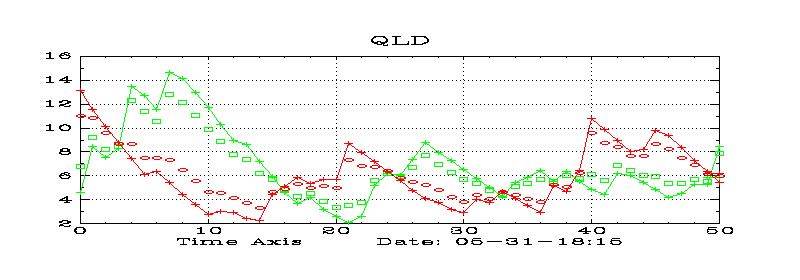
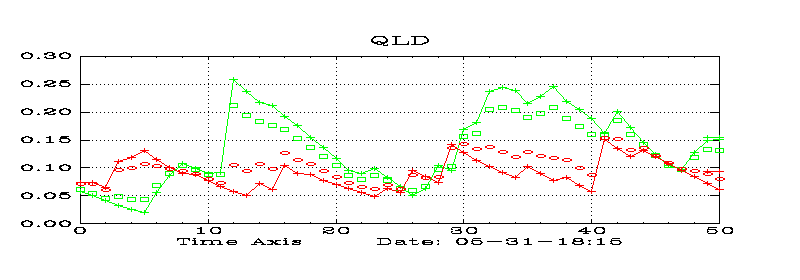
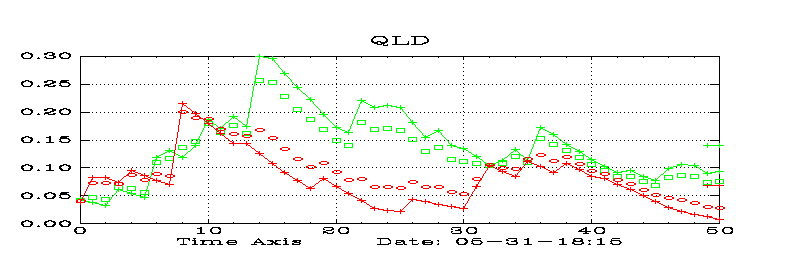
| QLD Intensity Graph for Monthly |
 |
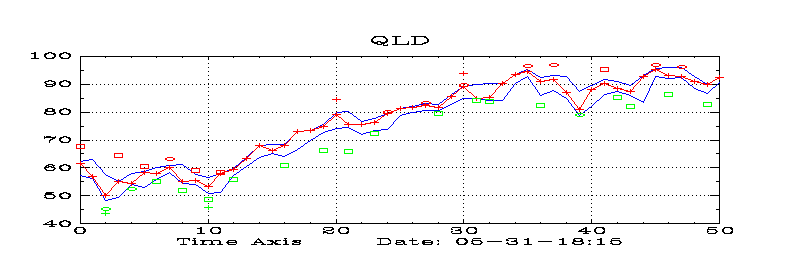
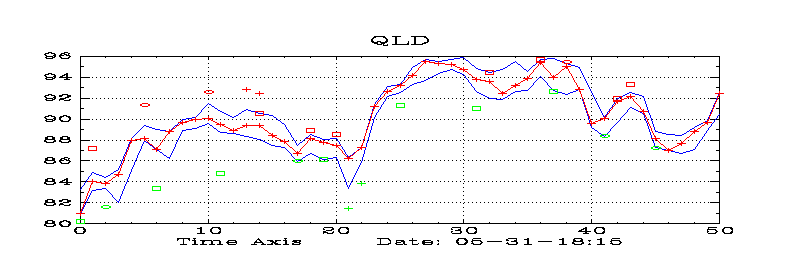
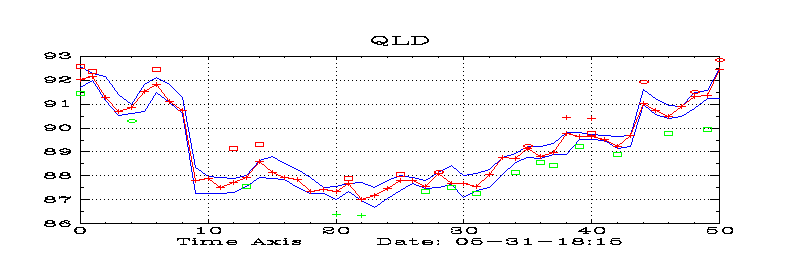
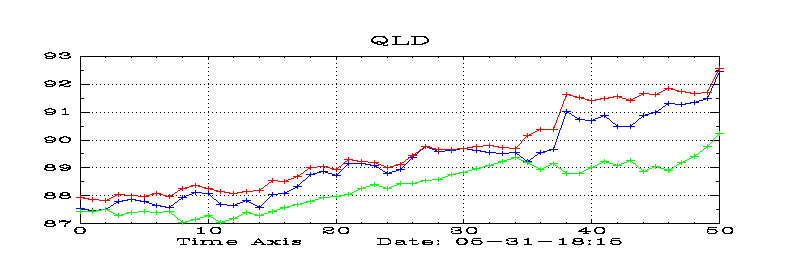
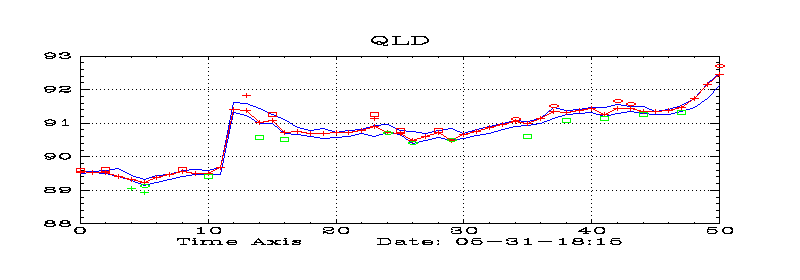
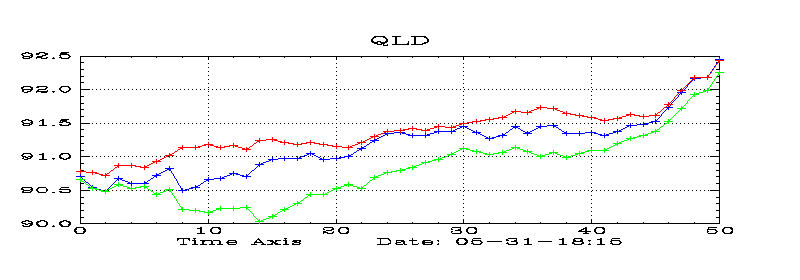
| QLD Price Envelope for Monthly |
 |
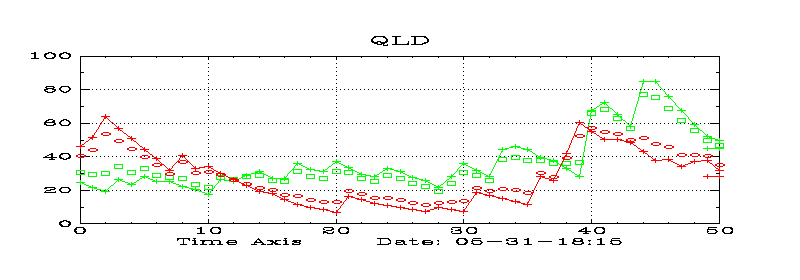
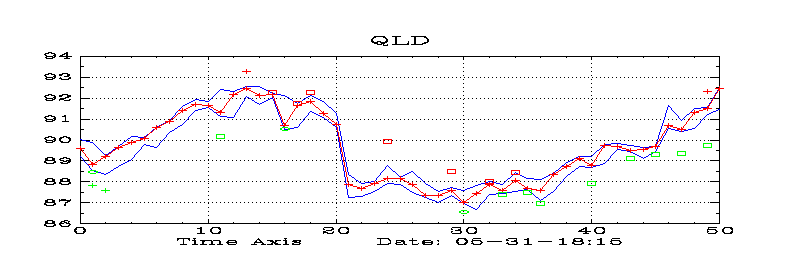
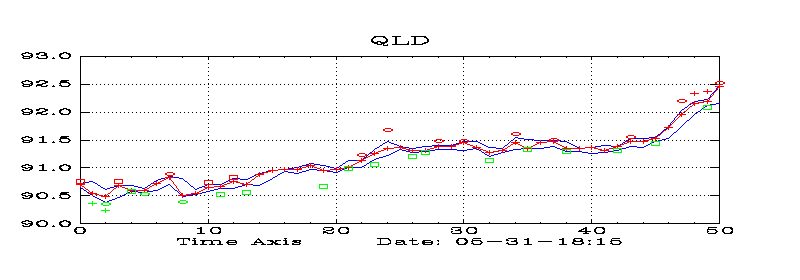
| QLD High Volume ADX for Monthly |
 |
| QLD High Volume ADX Envelope for Monthly |
 |
| QLD (Weekly) |
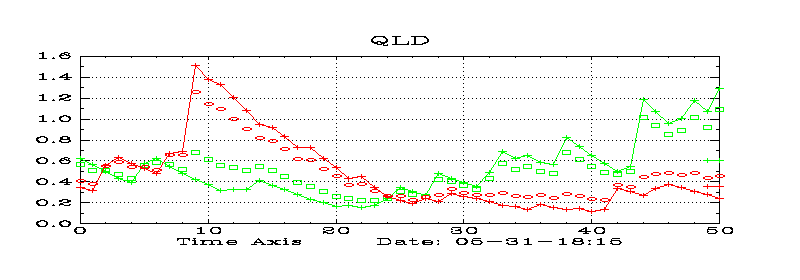
| QLD Trend Strength for Weekly |
 |
| QLD Intensity Graph for Weekly |
 |
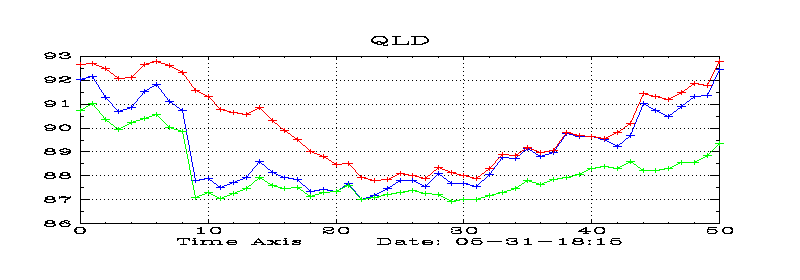
| QLD Price Envelope for Weekly |
 |
| QLD High Volume ADX for Weekly |
 |
| QLD High Volume ADX Envelope for Weekly |
 |
| QLD (Daily) |
| QLD Trend Strength for Daily |
 |
| QLD Intensity Graph for Daily |
 |
| QLD Price Envelope for Daily |
 |
| QLD High Volume ADX for Daily |
 |
| QLD High Volume ADX Envelope for Daily |
 |
| QLD (90) |
| QLD Trend Strength for 90 |
 |
| QLD Intensity Graph for 90 |
 |
| QLD Price Envelope for 90 |
 |
| QLD High Volume ADX for 90 |
 |
| QLD High Volume ADX Envelope for 90 |
 |
| QLD (60) |
| QLD Trend Strength for 60 |
 |
| QLD Intensity Graph for 60 |
 |
| QLD Price Envelope for 60 |
 |
| QLD High Volume ADX for 60 |
 |
| QLD High Volume ADX Envelope for 60 |
 |
| QLD (30) |
| QLD Trend Strength for 30 |
 |
| QLD Intensity Graph for 30 |
 |
| QLD Price Envelope for 30 |
 |
| QLD High Volume ADX for 30 |
 |
| QLD High Volume ADX Envelope for 30 |
 |
| QLD (10) |
| QLD Trend Strength for 10 |
 |
| QLD Intensity Graph for 10 |
 |
| QLD Price Envelope for 10 |
 |
| QLD High Volume ADX for 10 |
 |
| QLD High Volume ADX Envelope for 10 |
 |
| QLD (5) |
| QLD Trend Strength for 5 |
 |
| QLD Intensity Graph for 5 |
 |
| QLD Price Envelope for 5 |
 |
| QLD High Volume ADX for 5 |
 |
| QLD High Volume ADX Envelope for 5 |
 |